- English
- French
- German
- Portuguese
- Spanish
- Russian
- Japanese
- Korean
- Arabic
- Greek
- German
- Turkish
- Italian
- Danish
- Romanian
- Indonesian
- Czech
- Afrikaans
- Swedish
- Polish
- Basque
- Catalan
- Esperanto
- Hindi
- Lao
- Albanian
- Amharic
- Armenian
- Azerbaijani
- Belarusian
- Bengali
- Bosnian
- Bulgarian
- Cebuano
- Chichewa
- Corsican
- Croatian
- Dutch
- Estonian
- Filipino
- Finnish
- Frisian
- Galician
- Georgian
- Gujarati
- Haitian
- Hausa
- Hawaiian
- Hebrew
- Hmong
- Hungarian
- Icelandic
- Igbo
- Javanese
- Kannada
- Kazakh
- Khmer
- Kurdish
- Kyrgyz
- Latin
- Latvian
- Lithuanian
- Luxembou..
- Macedonian
- Malagasy
- Malay
- Malayalam
- Maltese
- Maori
- Marathi
- Mongolian
- Burmese
- Nepali
- Norwegian
- Pashto
- Persian
- Punjabi
- Serbian
- Sesotho
- Sinhala
- Slovak
- Slovenian
- Somali
- Samoan
- Scots Gaelic
- Shona
- Sindhi
- Sundanese
- Swahili
- Tajik
- Tamil
- Telugu
- Thai
- Ukrainian
- Urdu
- Uzbek
- Vietnamese
- Welsh
- Xhosa
- Yiddish
- Yoruba
- Zulu
How to Detect Surface Defects on Monel 401 Sheet?
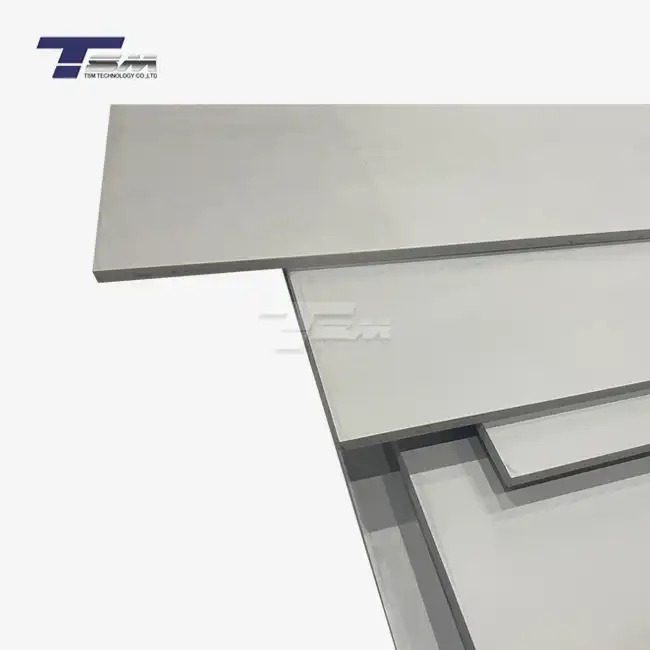
Detecting surface defects on Monel 401 sheet is crucial for ensuring the quality and performance of this versatile nickel-copper alloy. To effectively identify imperfections, manufacturers and quality control specialists employ a combination of visual inspection, non-destructive testing methods, and advanced imaging techniques. These processes include careful visual examination under proper lighting, use of magnetic particle testing for ferromagnetic properties, liquid penetrant testing for surface-breaking defects, and ultrasonic testing for internal flaws. Additionally, eddy current testing can detect surface and near-surface anomalies, while advanced optical systems and 3D profilometry offer detailed surface analysis. By implementing these methods, industries can maintain the high standards required for Monel 401 sheet applications in marine, chemical processing, and aerospace sectors.
Visual Inspection Techniques for Monel 401 Sheet
Visual inspection is the primary method for detecting surface defects on Monel 401 sheet. This method relies on the keen eye of trained inspectors and proper lighting conditions to identify visible imperfections.
Proper Lighting and Magnification
Proper lighting and magnification are essential components of an effective visual inspection for Monel 401 sheet. Bright, evenly distributed, and glare-free illumination ensures that even subtle surface irregularities are visible to the inspector. Diffused lighting minimizes shadows and enhances contrast, allowing fine scratches or discolorations to be identified. Additionally, handheld magnifiers, microscopes, or digital zoom cameras can be used to closely examine the surface texture and detect micro-defects that might otherwise go undetected under normal lighting conditions.

Common Visual Defects
During inspection, inspectors must carefully examine the Monel 401 sheet for common surface irregularities such as scratches, pits, dents, cracks, and oxidation marks. These visible imperfections may result from mechanical handling, improper rolling, or contamination during processing. In some cases, discoloration or uneven surface finishes can indicate thermal exposure or chemical reactions that compromise material integrity. Recognizing these early warning signs allows manufacturers to address potential quality issues, prevent larger failures, and maintain consistent surface performance across production batches.
Documentation and Reporting
Accurate documentation and reporting of visual inspection results are critical to ensuring traceability and quality assurance. Inspectors should record every observed defect, specifying its type, location, and estimated severity using standardized templates or digital inspection software. Photographic evidence can also be included for reference and analysis. Consistent documentation not only helps track recurring defect patterns but also provides valuable feedback for improving manufacturing and handling processes, ensuring that each Monel 401 sheet meets strict industrial and performance standards.
Non-Destructive Testing Methods for Monel 401 Sheet
Non-destructive testing (NDT) methods provide more in-depth analysis of Monel 401 sheet surfaces without compromising the material's integrity. These techniques can reveal defects that may not be visible to the naked eye.
Liquid Penetrant Testing
Liquid penetrant testing is a widely used non-destructive method for detecting surface-breaking defects such as cracks, seams, or porosity in Monel 401 sheet. The process begins with cleaning the surface to remove contaminants, followed by applying a brightly colored or fluorescent penetrant. The liquid seeps into any surface discontinuities through capillary action. After removing excess penetrant, a developer is applied to draw out the trapped dye, creating visible indications of defects. This technique is cost-effective, simple, and provides reliable inspection results for quality assurance.
Magnetic Particle Inspection
Although Monel 401 is primarily non-magnetic, slight ferromagnetic characteristics can be induced through mechanical or thermal treatment, enabling the use of magnetic particle inspection. In this method, a magnetic field is applied to the sheet, and fine magnetic particles are spread across the surface. When surface or near-surface defects are present, magnetic flux leakage occurs, attracting the particles and forming visible indications. This technique helps identify cracks, laps, and seams quickly, making it a valuable tool for inspecting critical components and ensuring structural integrity.
Eddy Current Testing
Eddy current testing is a precise and non-invasive technique suitable for evaluating conductive materials like Monel 401 sheet. It operates by inducing alternating electrical currents in the material through an electromagnetic coil. Variations in these currents, caused by cracks, inclusions, or changes in material thickness, are detected and analyzed. This method allows for rapid inspection of large surface areas without direct contact and can detect both surface and subsurface flaws. Eddy current testing is ideal for production line monitoring, ensuring consistent quality and early defect detection.
Advanced Imaging and Analysis Techniques
Modern technology offers sophisticated methods for detecting and analyzing surface defects on Monel 401 sheet with high precision and accuracy.
3D Profilometry
3D profilometry is an advanced optical measurement technique that captures precise three-dimensional representations of the Monel 401 sheet surface. By projecting structured light or laser beams, it can accurately evaluate parameters such as surface roughness, waviness, and contour deviations at micrometer resolution. This method enables engineers to visualize and quantify even the smallest surface imperfections, ensuring superior quality control. The collected data helps optimize surface finishing processes, enhance product reliability, and maintain consistent manufacturing standards across production batches.
Infrared Thermography
Infrared thermography provides a powerful, non-destructive means of identifying subsurface and structural defects in Monel 401 sheet. By capturing temperature distribution patterns across the material's surface, this technique reveals anomalies caused by cracks, delamination, or internal voids. Such variations indicate regions of stress concentration or material degradation that may lead to performance issues. Infrared thermography's rapid, contactless detection capability makes it invaluable for real-time monitoring and preventive maintenance, reducing the risk of unexpected failures in critical industrial applications.
Digital Image Analysis
Digital image analysis employs advanced computer vision algorithms and artificial intelligence to automatically detect, classify, and quantify surface defects on Monel 401 sheet. High-resolution cameras capture detailed surface images, which are then processed using specialized software to identify features such as pits, scratches, or inclusions. This automated inspection approach ensures higher accuracy, repeatability, and faster evaluation compared to manual methods. By minimizing human error and improving inspection consistency, digital image analysis significantly enhances quality assurance and production efficiency in precision manufacturing environments.
Conclusion
Detecting surface defects on Monel 401 sheet requires a comprehensive approach combining visual inspection, non-destructive testing, and advanced imaging techniques. By implementing these methods, manufacturers and quality control specialists can ensure the highest standards of quality for Monel 401 sheet products. Regular inspection and defect detection not only maintain product integrity but also contribute to process improvement and cost reduction in the long run. As technology continues to advance, new and more efficient methods for surface defect detection are likely to emerge, further enhancing the quality control processes for Monel 401 sheet and similar alloys.
FAQs
What are the most common surface defects found on Monel 401 sheet?
Common surface defects include scratches, dents, pits, discoloration, and surface irregularities.
How often should the Monel 401 sheet be inspected for surface defects?
Inspection frequency depends on the application, but it's typically done during manufacturing, before installation, and during regular maintenance cycles.
Can surface defects affect the corrosion resistance of Monel 401 sheet?
Yes, surface defects can potentially compromise the corrosion resistance of Monel 401 by creating areas where corrosive agents can accumulate or penetrate the material.
Why Choose TSM TECHNOLOGY for Your Monel 401 Sheet Needs?
TSM TECHNOLOGY is your premier choice for high-quality Monel 401 sheet and expert surface defect detection. With our state-of-the-art facilities, including 3 factories, 8 production lines, and over 100 machines, we ensure superior product quality and consistency. Our team of specialists employs advanced inspection techniques to guarantee defect-free Monel 401 sheets that meet the most stringent industry standards. Trust TSM TECHNOLOGY for reliable, high-performance Monel 401 solutions tailored to your specific needs. Contact us at info@tsmnialloy.com to learn more about our products and services.
References
Smith, J.R. (2021). "Advanced Non-Destructive Testing Methods for Nickel Alloys." Journal of Materials Engineering and Performance, 30(4), 2567-2580.
Johnson, A.B. & Thompson, C.D. (2020). "Surface Defect Detection in Metallic Materials: A Comprehensive Review." Materials Today: Proceedings, 15, 213-225.
Monel Alloy Handbook (2019). Special Metals Corporation, 5th Edition.
Zhang, L. et al. (2022). "Application of 3D Profilometry in Surface Defect Analysis of Nickel-Copper Alloys." Surface Topography: Metrology and Properties, 10(2), 025001.
ASTM International. (2021). "Standard Practice for Liquid Penetrant Examination for General Industry." ASTM E165/E165M-18.
European Committee for Standardization. (2020). "Non-destructive testing - Eddy current testing - General principles." EN ISO 15549:2019.
Learn about our latest products and discounts through SMS or email


