The Importance of Microstructure in Inconel 600 Bars
Understanding Grain Structure and Its Impact
The microstructure of Inconel 600 bars is a critical factor in determining their overall performance. The grain structure, which refers to the arrangement and size of individual grains within the metal, significantly influences mechanical properties such as strength, ductility, and resistance to creep. Metallographic analysis allows engineers to examine these grain structures in detail, providing valuable information about the material's behavior under various conditions.

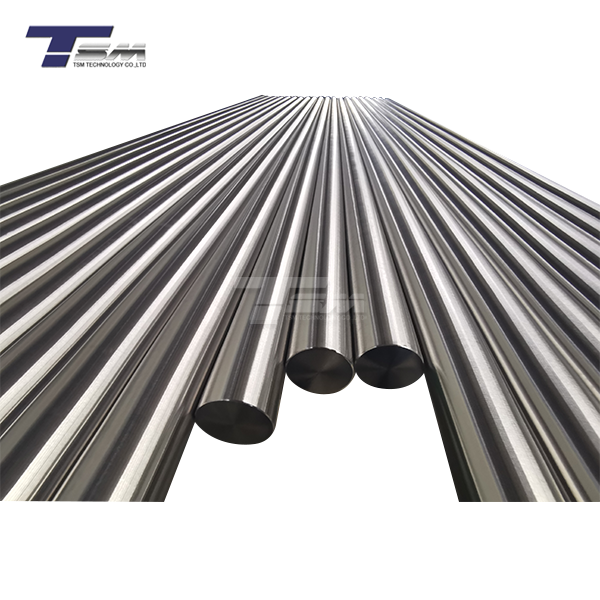
Fine-grained structures typically result in higher strength and improved resistance to fatigue, while coarser grains may offer better creep resistance at elevated temperatures. By analyzing the grain structure of Inconel 600 round bars, manufacturers can ensure that the material meets specific requirements for different applications, whether it's for high-stress environments or prolonged exposure to extreme temperatures.
Identifying and Analyzing Precipitates
Precipitates, or secondary phases, that form within the microstructure of Inconel 600 bars can significantly affect their properties. These microscopic particles can either enhance or degrade the alloy's performance, depending on their composition, size, and distribution. Metallographic analysis enables the identification and characterization of these precipitates, allowing for a deeper understanding of their impact on the material's behavior.
For instance, the presence of carbides along grain boundaries can improve the alloy's high-temperature strength but may also increase susceptibility to intergranular corrosion. By carefully examining these precipitates, metallurgists can optimize heat treatment processes to achieve the desired balance of properties in alloy 600 round bars.
Assessing Phase Uniformity and Segregation
Inconel 600 bars must exhibit uniform phase distribution to ensure consistent properties throughout the material. Metallographic analysis helps in detecting any phase segregation or non-uniformity that could lead to localized weak points or variations in performance. This is particularly important for large diameter Inconel 600 round bars, where maintaining homogeneity across the entire cross-section can be challenging.
By evaluating phase uniformity, manufacturers can refine their production processes to minimize segregation and ensure that each section of the bar meets the required specifications. This level of quality control is essential for applications where the integrity of the entire component is critical, such as in pressure vessels or heat exchangers.
Defect Detection and Quality Assurance
Identifying Manufacturing Defects
Metallographic analysis serves as a powerful tool for detecting manufacturing defects in Inconel 600 bars that may not be visible to the naked eye or through other non-destructive testing methods. These defects can include microscopic cracks, voids, inclusions, or other imperfections that could compromise the material's performance or lead to premature failure.
By examining polished and etched samples under high magnification, quality control experts can identify these defects and trace their origins to specific stages in the manufacturing process. This information is invaluable for continually improving production techniques and ensuring that Inconel 600 round bars meet the stringent quality standards required for critical applications.
Assessing Heat Treatment Effectiveness
Heat treatment is a crucial step in the production of Inconel 600 bars, as it helps achieve the desired mechanical properties and microstructure. Metallographic analysis allows manufacturers to evaluate the effectiveness of their heat treatment processes by examining changes in grain size, precipitate formation, and phase transformations.
For example, solution annealing treatments aim to dissolve precipitates and homogenize the microstructure of alloy 600 round bars. Metallographic examination can confirm whether this process has been successful by revealing a uniform, single-phase structure. Similarly, age-hardening treatments can be optimized by analyzing the size and distribution of strengthening precipitates formed during the process.
Verifying Surface Treatments and Coatings
In some applications, Inconel 600 bars may undergo surface treatments or receive protective coatings to enhance their performance in specific environments. Metallographic analysis plays a crucial role in verifying the quality and thickness of these surface modifications.
By examining cross-sections of treated Inconel 600 round bars, analysts can measure the depth of surface hardening, assess the uniformity of coatings, and detect any potential defects or discontinuities at the interface between the base metal and the surface layer. This information is essential for ensuring that surface treatments effectively provide the intended benefits, such as improved wear resistance or enhanced corrosion protection.
Optimizing Processing Parameters and Performance Prediction
Correlating Microstructure with Mechanical Properties
One of the most valuable aspects of metallographic analysis is its ability to establish correlations between microstructural features and the mechanical properties of Inconel 600 bars. By systematically studying the relationships between grain size, precipitate distribution, and performance characteristics such as yield strength, tensile strength, and ductility, manufacturers can develop predictive models for material behavior.
These models allow for more accurate estimation of how alloy 600 round bars will perform under various conditions, enabling engineers to make informed decisions about material selection and design parameters. For instance, understanding how different cooling rates during heat treatment affect grain size and, consequently, the material's strength can help optimize processing parameters for specific application requirements.
Refining Welding and Joining Processes
Inconel 600 bars are often used in applications that require welding or other joining methods. Metallographic analysis of welded joints provides critical information about the heat-affected zone (HAZ), fusion zone microstructure, and potential defects that may arise during the welding process.
By examining the microstructural changes that occur during welding, engineers can refine welding parameters such as heat input, filler material composition, and post-weld heat treatment procedures. This optimization helps ensure that welded joints in Inconel 600 round bars maintain the desired strength and corrosion resistance, which is particularly important in high-temperature or corrosive environments where joint failure could have severe consequences.
Long-term Performance Prediction and Failure Analysis
Metallographic analysis is an indispensable tool for predicting the long-term performance of Inconel 600 bars and conducting failure analysis when issues arise. By examining the microstructural evolution of samples exposed to service conditions or accelerated testing environments, analysts can gain insights into degradation mechanisms and potential failure modes.
For example, studying the growth of oxide scales or the progression of intergranular corrosion in alloy 600 round bars can help predict component lifetimes and establish appropriate inspection intervals. In cases where premature failure occurs, metallographic examination of the failed components can reveal the root cause, whether it's due to unexpected microstructural changes, environmental factors, or manufacturing defects. This information is crucial for preventing similar failures in the future and continuously improving the reliability of Inconel 600 bar applications.
Conclusion
Metallographic analysis is an indispensable tool in ensuring the quality, reliability, and optimal performance of Inconel 600 bars. By providing detailed insights into the material's microstructure, this analytical technique enables manufacturers and end-users to verify critical properties, detect potential defects, and refine processing parameters. From understanding grain structures and precipitate formation to optimizing heat treatments and predicting long-term performance, metallographic analysis serves as a cornerstone in maintaining the integrity of Inconel 600 round bars across diverse industrial applications. As material demands become increasingly stringent, the role of metallographic analysis in quality assurance and product development will only continue to grow in importance.
Contact Us
To learn more about our high-quality Inconel 600 bars and how our rigorous metallographic analysis ensures superior performance, contact TSM TECHNOLOGY today. Our team of experts is ready to assist you in selecting the perfect alloy for your specific needs. Reach out to us at info@tsmnialloy.com and experience the difference that precision engineering and advanced materials can make in your projects.


