- English
- French
- German
- Portuguese
- Spanish
- Russian
- Japanese
- Korean
- Arabic
- Greek
- German
- Turkish
- Italian
- Danish
- Romanian
- Indonesian
- Czech
- Afrikaans
- Swedish
- Polish
- Basque
- Catalan
- Esperanto
- Hindi
- Lao
- Albanian
- Amharic
- Armenian
- Azerbaijani
- Belarusian
- Bengali
- Bosnian
- Bulgarian
- Cebuano
- Chichewa
- Corsican
- Croatian
- Dutch
- Estonian
- Filipino
- Finnish
- Frisian
- Galician
- Georgian
- Gujarati
- Haitian
- Hausa
- Hawaiian
- Hebrew
- Hmong
- Hungarian
- Icelandic
- Igbo
- Javanese
- Kannada
- Kazakh
- Khmer
- Kurdish
- Kyrgyz
- Latin
- Latvian
- Lithuanian
- Luxembou..
- Macedonian
- Malagasy
- Malay
- Malayalam
- Maltese
- Maori
- Marathi
- Mongolian
- Burmese
- Nepali
- Norwegian
- Pashto
- Persian
- Punjabi
- Serbian
- Sesotho
- Sinhala
- Slovak
- Slovenian
- Somali
- Samoan
- Scots Gaelic
- Shona
- Sindhi
- Sundanese
- Swahili
- Tajik
- Tamil
- Telugu
- Thai
- Ukrainian
- Urdu
- Uzbek
- Vietnamese
- Welsh
- Xhosa
- Yiddish
- Yoruba
- Zulu
How to Measure Tensile Strength of Nickel Alloy Round Bars?
Measuring the tensile strength of nickel alloy round bars is crucial for ensuring their performance in demanding applications. This process typically involves using a universal testing machine to apply a controlled, gradually increasing load to a specimen until failure occurs. The test measures the bar's ability to resist breaking under tension, providing valuable data on its ultimate tensile strength, yield strength, and elongation. Proper specimen preparation, accurate calibration of testing equipment, and adherence to standardized testing procedures (such as ASTM E8) are essential for obtaining reliable results. These measurements are vital for quality control and material selection in industries like aerospace, petrochemical, and power generation.
Understanding Nickel Alloy Round Bars and Their Properties
Composition and Characteristics of Nickel Alloy Round Bars
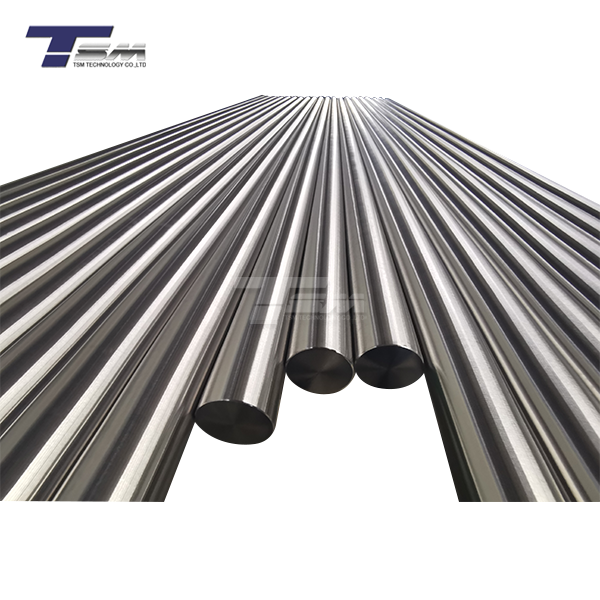
Nickel alloy round bars are high-performance materials known for their exceptional strength, corrosion resistance, and heat tolerance. These alloys typically contain a significant percentage of nickel combined with other elements such as chromium, molybdenum, and iron. The specific composition varies depending on the alloy grade, which can include popular types like Inconel, Monel, and Hastelloy.

The unique properties of nickel alloy round bars make them ideal for use in extreme environments. They exhibit:
- Superior resistance to oxidation and corrosion
- High strength at elevated temperatures
- Excellent ductility and toughness
- Good weldability and formability
These characteristics contribute to their widespread use in industries such as aerospace, chemical processing, and oil and gas exploration.
Importance of Tensile Strength in Nickel Alloy Applications
Tensile strength is a critical property for nickel alloy round bars, as it directly influences their performance in various applications. It measures the material's ability to withstand tension without failing, which is essential in many high-stress environments. Understanding the tensile strength helps engineers and designers:
- Ensure safety and reliability in critical components
- Optimize material selection for specific applications
- Predict performance under various load conditions
- Develop new alloys with improved properties
Accurate measurement of tensile strength is therefore crucial for quality control and product development in the nickel alloy industry.
Factors Affecting Tensile Strength in Nickel Alloys
Several factors can influence the tensile strength of nickel alloy round bars:
- Alloy composition: The precise mix of elements in the alloy can significantly impact its strength.
- Heat treatment: Processes like annealing or age hardening can alter the material's microstructure and strength.
- Manufacturing method: Techniques such as hot forging or cold drawing can affect the bar's mechanical properties.
- Grain size and orientation: Finer grain structures typically result in higher strength.
- Environmental conditions: Temperature and corrosive environments can impact the alloy's performance.
Understanding these factors is essential for accurate tensile strength measurement and interpretation of results.
Preparation and Equipment for Tensile Strength Testing
Specimen Preparation for Tensile Testing
Proper specimen preparation is crucial for obtaining accurate tensile strength measurements of nickel alloy round bars. The process typically involves:
- Cutting: Extracting a sample from the round bar, ensuring it's representative of the entire batch.
- Machining: Shaping the specimen to standard dimensions as specified by testing standards (e.g., ASTM E8).
- Surface finishing: Removing any surface irregularities that could affect test results.
- Marking: Adding gauge marks for measuring elongation during the test.
It's essential to avoid introducing any defects or altering the material's properties during preparation, as this could skew the test results.
Universal Testing Machine Setup and Calibration
The universal testing machine (UTM) is the primary equipment used for tensile strength testing. Proper setup and calibration are critical for accurate measurements:
- Machine selection: Choose a UTM with an appropriate load capacity for the expected strength of the nickel alloy.
- Load cell calibration: Ensure the load cell is accurately calibrated to provide precise force measurements.
- Extensometer setup: Attach and calibrate an extensometer for strain measurement.
- Grips alignment: Ensure proper alignment of grips to prevent off-axis loading.
- Software configuration: Set up the testing software with the correct parameters for the specific alloy and test standard.
Regular maintenance and calibration checks are essential to maintain the accuracy of the testing equipment.
Environmental Considerations for Testing
The testing environment can significantly impact the tensile strength measurements of nickel alloy round bars. Key considerations include:
- Temperature control: Maintain a consistent room temperature, typically around 23°C (73°F), unless testing at specific elevated temperatures.
- Humidity regulation: Control humidity levels to prevent moisture-related effects on the specimen.
- Vibration isolation: Minimize external vibrations that could affect the testing machine's accuracy.
- Cleanliness: Ensure the testing area and equipment are clean to prevent contamination of specimens.
By controlling these environmental factors, you can ensure more consistent and reliable tensile strength measurements across different tests and batches of nickel alloy round bars.
Conducting the Tensile Strength Test and Data Analysis
Step-by-Step Testing Procedure
Conducting a tensile strength test on nickel alloy round bars involves a systematic approach to ensure accurate and repeatable results:
- Mount the specimen: Securely attach the prepared specimen to the grips of the universal testing machine.
- Apply preload: Apply a small initial load to remove any slack in the system.
- Set test parameters: Configure the testing machine with the appropriate strain rate and data collection frequency.
- Start the test: Begin applying tension to the specimen at a constant rate.
- Monitor progress: Observe the load-extension curve in real-time as the test progresses.
- Record failure: Continue the test until the specimen fails, recording the maximum load and elongation.
Throughout the process, it's crucial to follow standardized procedures, such as those outlined in ASTM E8, to ensure consistency and comparability of results.
Interpreting Stress-Strain Curves
The stress-strain curve generated during the tensile test provides valuable information about the nickel alloy's mechanical properties:
- Elastic region: The initial linear portion of the curve represents the material's elastic behavior.
- Yield point: The point where the curve deviates from linearity indicates the yield strength.
- Ultimate tensile strength: The highest point on the curve represents the maximum stress the material can withstand.
- Fracture point: The end of the curve shows where the specimen failed.
- Elongation: The total extension of the specimen before failure indicates its ductility.
Analyzing these aspects of the stress-strain curve provides insights into the nickel alloy's strength, elasticity, and overall performance under load.
Calculating Key Strength Parameters
From the raw data collected during the tensile test, several important strength parameters can be calculated:
- Ultimate Tensile Strength (UTS): Calculated by dividing the maximum load by the original cross-sectional area of the specimen.
- Yield Strength: Determined using the 0.2% offset method or by identifying the upper yield point, depending on the alloy's behavior.
- Elastic Modulus: Calculated from the slope of the elastic region of the stress-strain curve.
- Percent Elongation: Measured as the change in gauge length divided by the original gauge length, expressed as a percentage.
- Reduction in Area: Calculated by comparing the final cross-sectional area at the fracture point to the original area.
These calculations provide a comprehensive understanding of the nickel alloy round bar's mechanical properties, essential for quality control and material selection in various applications.
Conclusion
Measuring the tensile strength of nickel alloy round bars is a critical process that provides valuable insights into the material's mechanical properties and performance capabilities. By following standardized testing procedures, properly preparing specimens, and accurately analyzing the resulting data, manufacturers and engineers can ensure the reliability and suitability of these high-performance materials for demanding applications. The tensile strength, along with other mechanical properties derived from the test, serves as a crucial benchmark for quality control, material selection, and product development in industries ranging from aerospace to petrochemical processing. As nickel alloys continue to play a vital role in advanced engineering solutions, the importance of accurate and consistent tensile strength measurement cannot be overstated.
FAQs
What is the typical tensile strength range for nickel alloy round bars?
The tensile strength of nickel alloy round bars can vary widely depending on the specific alloy and its heat treatment. Generally, it ranges from 450 MPa to over 1,200 MPa.
How often should tensile strength tests be performed on nickel alloy round bars?
Tensile strength tests are typically performed on each batch or lot of nickel alloy round bars as part of quality control measures. Additional testing may be required for critical applications or if there are changes in the manufacturing process.
Can tensile strength tests be performed at elevated temperatures?
Yes, high-temperature tensile testing is often performed on nickel alloys to assess their performance in extreme conditions. Special equipment and procedures are required for these tests.
Trust TSM Technology for Premium Nickel Alloy Round Bars
As a leading manufacturer and supplier of nickel alloy round bars, TSM Technology offers a comprehensive range of high-quality products tailored to meet the most demanding industry requirements. With over 14 years of expertise, we provide nickel alloy round bars in various sizes, finishes, and specifications, ensuring superior corrosion resistance, high-temperature strength, and exceptional mechanical properties. Our strict quality control measures and adherence to international standards guarantee reliable performance in critical applications. For inquiries or to discuss your specific needs, please contact us at: info@tsmnialloy.com.
References
ASTM International. (2021). ASTM E8/E8M-21 Standard Test Methods for Tension Testing of Metallic Materials.
Davis, J.R. (2000). Nickel, Cobalt, and Their Alloys. ASM International.
Donachie, M.J., & Donachie, S.J. (2002). Superalloys: A Technical Guide. ASM International.
Special Metals Corporation. (2007). High-Performance Alloys for Resistance to Aqueous Corrosion.
Totten, G.E. (2016). Handbook of Mechanical Alloy Design. CRC Press.
Zhao, J.C., & Westbrook, J.H. (2003). Ultrahigh-Temperature Materials for Jet Engines. MRS Bulletin, 28(9), 622-630.
Learn about our latest products and discounts through SMS or email


